Manually Install Android 4.4.1 On The Nexus 5, Nexus 4 and Nexus 7 [How-To]

Earlier today, Google started rolling out the Android 4.4.1 update for the Nexus 5 and other devices from the Nexus series. While the Android 4.4.1 update is mainly aimed at improving the camera performance of the Nexus 5, there are still a lot of changes and bug-fixes for all the other devices that makes the update worth it.
If you have still not received the OTA update on your Nexus device, use our quick guide below to side load the update on your Nexus device.
The guide below does not require an unlocked bootloader or a root access, and will not wipe the data on your device as well. However, it is always better to have a backup of all your important data on the device in case things go wrong.
Files You’ll Need
1. Download the OTA update for your Nexus device from below. The links are directly taken from Google’s server, so the files have not been modified in any way.
For simplicity purposes, rename the OTA update file to something simpler like ‘android.zip’.
The OTA update has not yet started rolling out for other devices in the Nexus series yet. If and when they do, I will update this guide to add the download link for the OTA update for the missing devices.
2. Now, you will need to get your hands on the required ADB/Fastboot files. You can download the required ADB/Fastboot files for your PC from below -:
- Windows – Download link
- Mac – Download link
- Linux – Download link
Installation
3.Extract the files of the ZIP file inside a new folder named android on your desktop. If you are using Windows, use the Command prompt to navigate to this folder.
Go to Run, type cmd and press the Enter key. From the Command prompt window that opens up, enter the following command -:
cd desktop/android
You need to enter the same command on Mac or Linux inside a new Terminal window.
![]()
4. You will now need to reboot your Nexus device into Bootloader mode. The process varies from device to device though. On the new Nexus 7, users will need to switch off the device and then press the Volume down + Power button.

On the Nexus 4, switch off the device, and then simultaneously press the Volume up + Volume down + Power button. This should get you into Bootloader mode. From here, use the Volume keys to select the Recovery mode option and confirm it by pressing the Power key.
5. Your Nexus device will automatically reboot and you should see an Android logo with an exclamation mark. Now, press the Volume down button followed by the Power button, which should get you into Recovery mode. This step is going to be finicky so chances are you are not going to succeed right at the first time.
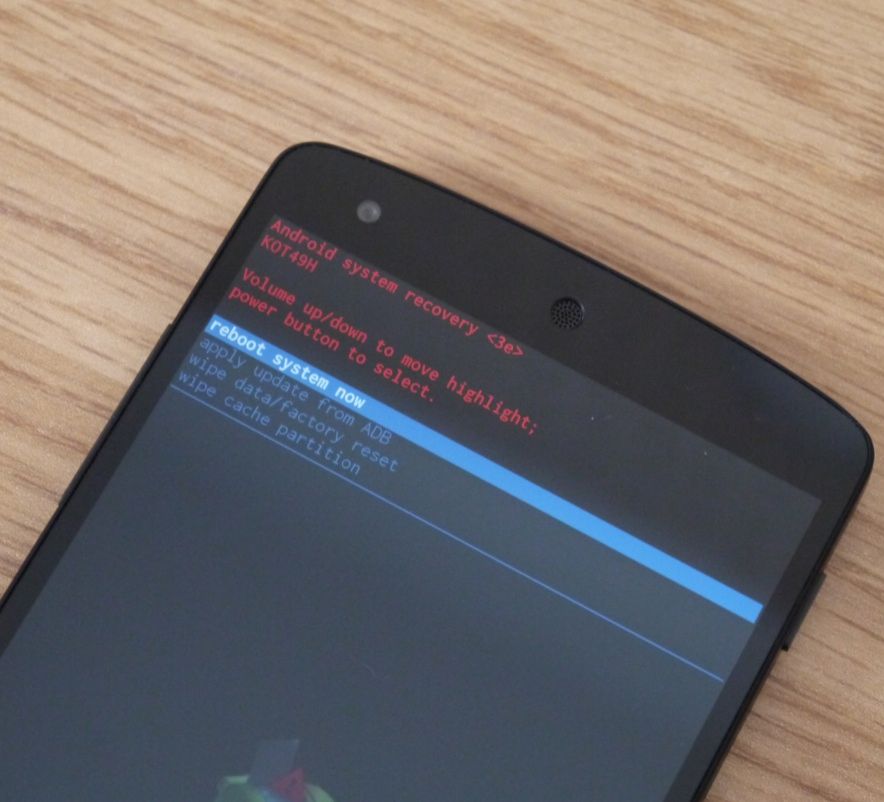
6. Using the volume keys, highlight the ‘apply update from ADB’ option and then confirm it by pressing the Power key.
Now, connect the device to your PC and enter the command below in the terminal window you had opened in Step 3.
Windows:
adb sideload android.zip
Mac/Linux:
./adb sideload android.zip

Once the OTA update has been transferred and flashed on your Nexus, select the ‘reboot system now’ option. The first boot will take some time so please be patient.
If you face any issues during the update procedure, drop in a comment and we will be glad to help!

