Nexus 7 Second-Generation Gets The Teardown Treatment
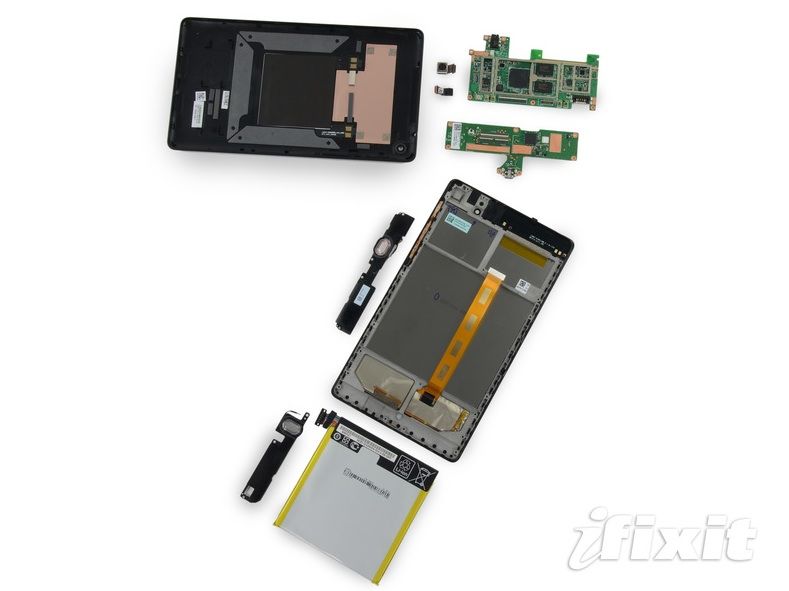
An overview of the Nexus 7 second-generation disassembled.
Google’s latest flagship tablet, the Nexus 7 2nd generation, is the latest victim to receive the teardown treatment. It doesn’t take much to strip the device, in fact, all that is needed is a Phillips #0 screwdriver, a set of plastic opening tools, and a spudger. Once you peel off the casing you’re presented with a collection of the latest hardware which powers the Nexus 7… Here’s a detailed insight of all the components that are packed inside.
The device features a 1.5 GHz Qualcomm Snapdragon Pro S4 processor, 2GB of RAM, an Adreno 320 GPU, a 5 MP rear-facing camera, and ships running Android 4.3 Jelly Bean. Now, let’s get down to the rest of the nitty-gritty stuff; provided by iFixit.
Removing The Casing
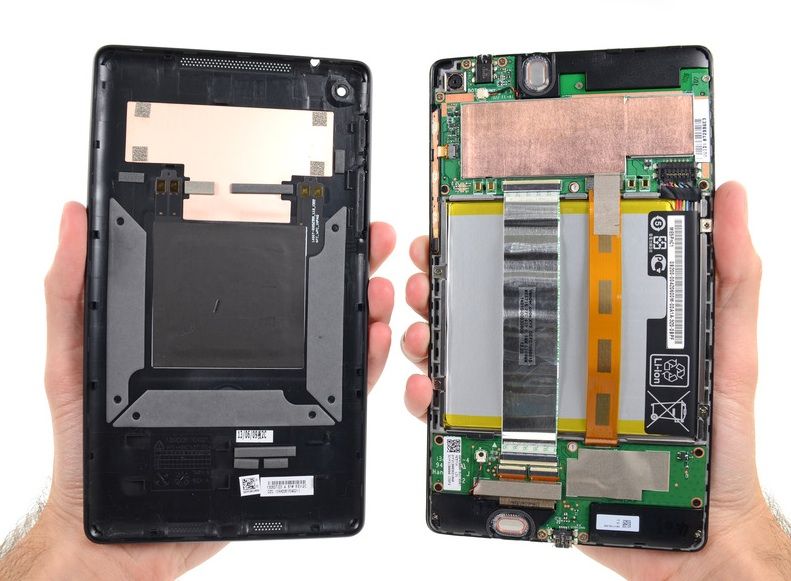
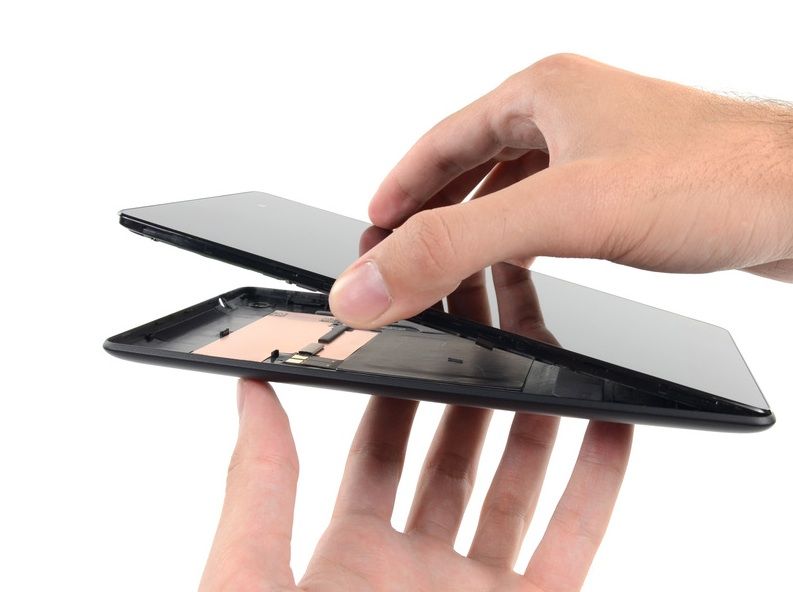
The first glance inside.
A simple plastic opening tool is all that is required to enter the Nexus 7’s enclosure, after unsealing the tablets outer casing the device easily separates into two pieces; the front and back and presents its much-anticipated internals. The first glance reveals a gigantic battery, similar to the cell inside the first-generation Nexus 7 and iPad Mini.
On the back of the device is an inductive charging coil, signifying that the new Nexus 7 has wireless charging capabilities. This is the first time we have ever witnessed an inductive charging system built into a tablet; hopefully this is the beginning of a new trend for other OEMs to follow.
The slate also has an integrated NFC module which is layered on top of the inductive charging coil to save space within the device.
Disconnecting The Battery

The battery easily slides out.
In order to reveal more of the device it’s essential to remove the battery, to do this you will need to a use a spudger to free the cell from its bonds. Plastic seals cover each of the two screws within the Nexus 7 (both of which need to be removed to disconnect the battery), and there’s a seal on each of the main PCB boards.
Once the screws have been removed, and the sticky adhesive has been peeled away, the battery tray easily slides out to reveal a pretty impressive 3950 mAh power unit. Packed inside the original Nexus 7 was a mighty 4326 mAh battery, despite this, the new generation is said to provide an extra hour of battery life due to its low power consumption.
Separating The PCB Boards
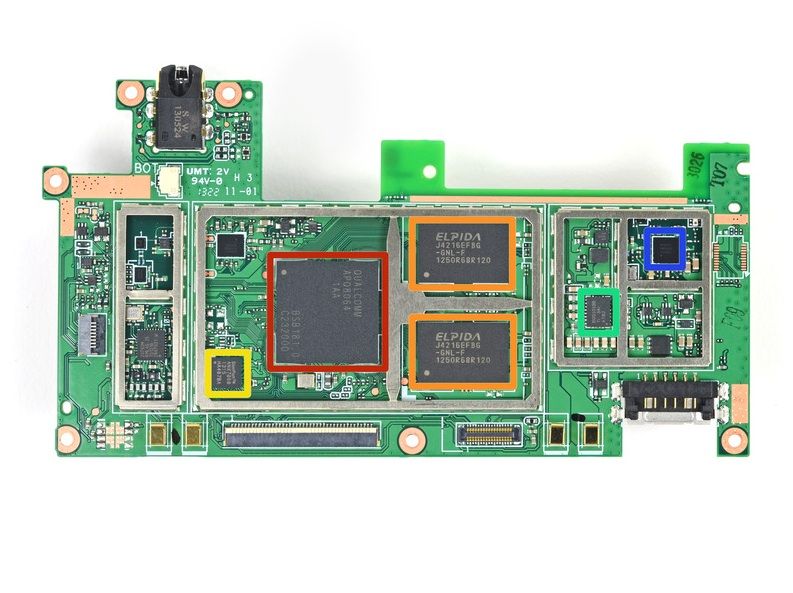
First look at the motherboard.
The daughterboard is the first system board you are presented with. It is easily removed once an assortment of seals are disconnected. This board isn’t home to anything overly exciting; it accommodates an Integrated Chip embedded amongst the connectors and what we believe to be the Nexus 7’s capacitive touchpad controller from ELAN’s eKT line, more specifically the ELAN eKTH325BAWS.
Next, the motherboard is detached from the plastic casing, and the front and rear-facing cameras are easily disconnected and removed, close inspection reveals that the rear camera is home to 5,000,000 pixels (5MP), and the front camera houses 1,200,000 pixels (1.2MP).
The motherboard is by far the most crucial and interesting part of the device, consisting of:
- Qualcomm APQ8064 Snapdragon S4 Pro Quad-Core CPU (includes the Adreno 320 GPU)
- Elpida J4216EFBG 512 MB DDR3L SDRAM (four Integrated Chips for 2GB total)
- Analogix ANX7808 SlimPort Transmitter
- Texas Instruments BQ51013B Inductive Charging Controller
- Qualcomm Atheros WCN3660 WLAN a/b/g/n, Bluetooth 4.0 (BR/EDR+BLE), and FM Radio Module
- SK Hynix H26M51003EQR 16 GB eMMC NAND Flash
- Qualcomm PM8921 Quick Charge Battery Management IC
Examining The Speakers

The speakers are tightly packed into the top and bottom of the device.
The stereo speakers are packed into both the top and bottom of the device. However, we know very little about them. In fact, all we do know about the new Nexus 7’s speakers is that they are labeled “DN17128L000.” A quick search on the internet reveals nothing about this audio system.
Disconnecting The Wi-Fi Antennas
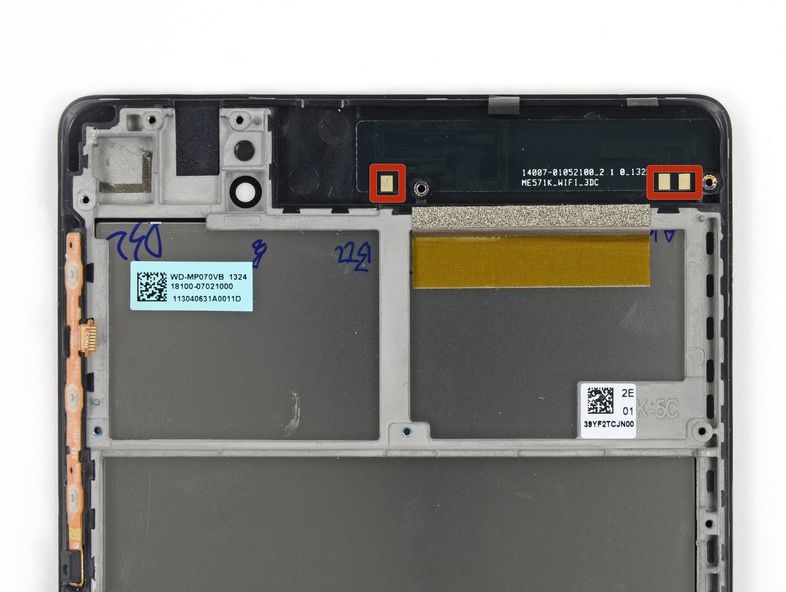
A quick look at the 802.11ac Wi-Fi antenna’s.
The Wi-Fi antennas are crammed tightly at the top behind the front panel, however, yet again we know very little about this wireless signal receiver. The antenna is labeled “ME571K_WIFI_3DC” and is capable of achieving colossal internet speeds, due to the integrated 802.11ac technology.
Repairability
It simply slots back together.
iFixit has provided a repairability score for the Nexus 7 2nd generation, which achieves a respectable 7 out of 10; where 10 is being the easiest to repair.
According to the disassembly team the rear casing was extremely easy to open, and minimal prying effort was required to remove the enclosure, but unfortunately it cracked, even though the team were quite careful during the opening procedure. All of the fastening screws inside were Phillips, meaning that they could easily be removed with a single #0 Phillips screwdriver. The front glass is securely glued to the display frame so you will need a heat gun to remove the LCD or smash and replace the whole front panel.
- SourceiFixit

