How to root the HTC One (M8)
The new HTC One (M8) went on sale immediately after its announcement in the United States. Initial reports suggest that the handset is selling very well and it is looks like HTC might have finally hit the jackpot. Just like its predecessor, rooting the new HTC One (M8) is a pretty straightforward process if you know your way around ADB and Fastboot.
Before you start with the rooting guide below, keep in mind that the steps below will work with all the variants of the One (M8) that come with an unlockable bootloader. This means that owners of certain carrier branded US variants (hint: Verizon) of One are out of luck and need to look for other ways of gaining root access on their handset.
Before we proceed further though, keep in mind that following the steps below will void your One’s warranty and wipe clean it of all data.
All set? Follow the steps below then.
Unlocking the bootloader
1. Since the One (M8) comes with an unlockable bootloader, you will first need to unlock it before you can gain root access. You can follow this guide to unlock the bootloader of One (M8) or just about any supported handset from the Taiwanese OEM.
Download the required files
2. You will need to download the correct TWRP recovery and the ADB/Fastboot files, if you did not while unlocking the bootloader, for your One (M8) now.
- TWRP recovery for International M8 GSM
- TWRP recovery for M8 (Sprint)
- TWRP recovery for AT&T M8
- ADB/Fastboot files for Windows, Mac
- SuperSU ZIP file
For simplicity purposes, rename the TWRP image file to “m8recovery.img“. Also, make sure to place this image file inside the same folder where you had extracted the ADB/Fastboot files while unlocking the bootloader. You will also need to transfer the SuperSU zip file to the internal storage of your One (M8).
The steps below are also valid for Mac users, except that they will need to prefix a “./” before any fastboot command.
Rooting the device
3. Now, open a command prompt or Terminal instance in the same folder where the ADB/Fastboot and TWRP image files are located. If you are using Windows 7 or 8, simply type “cmd” in the Start menu search and press enter. Then navigate to the folder using the cd command.
For example, if you have the fastboot and TWRP files inside a folder named “android” on your desktop, you can navigate to it by entering cd /Desktop/android. By default, a new command prompt instance always opens up in the user directory of Windows.
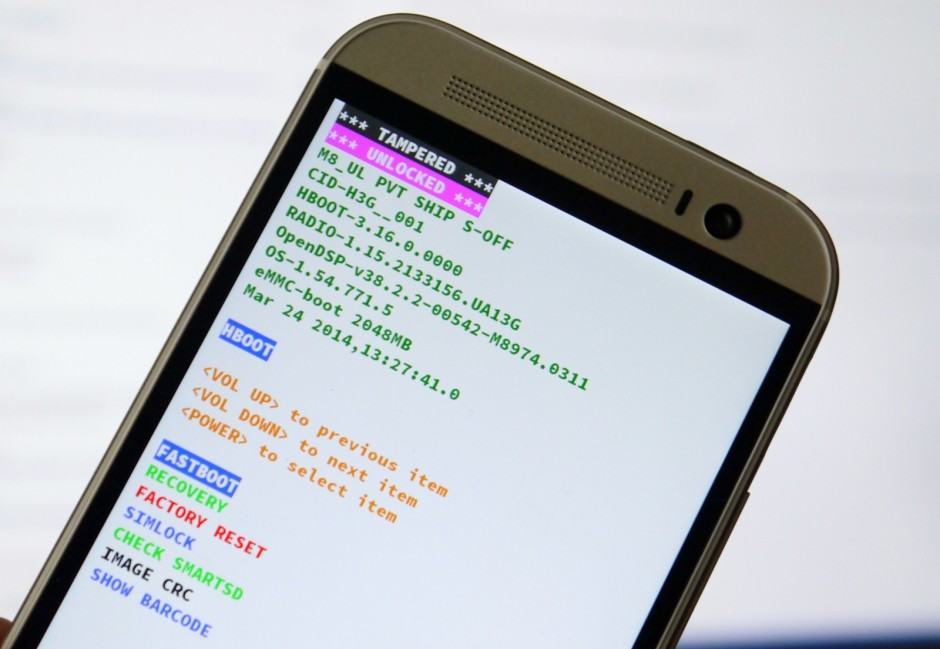
4. Put your One in fastboot mode by powering it off, and then press the Power + Volume Down button, simultaneously. From the menu that comes up, navigate to the fastboot option using the volume keys and confirm it by pressing the Power key. Then, connect the handset to your PC.
To make sure that the device is properly detected, enter the following command in the command prompt or terminal window you had opened in step 2:
fastboot devices
Hint: Mac users need to enter “./fastboot devices”.
![]()
5. Now, flash the TWRP recovery on your One (M8) by entering the following command:
fastboot flash recovery m8recovery.img
Do note that the “m8recovery.img” is just the file name of the TWRP recovery image. If the files name do not match, you will get a file not found error. Once the recovery has been flashed, reboot your One into Android OS manually or by entering the command below:
fastboot reboot
6.You will now need to reboot your One into recovery mode. Do this by switching off the device first and then press the Volume Down + Power buttons, simultaneously.Using the volume keys, navigate to the Recovery option and select it by pressing the Power key. The custom recovery — TWRP — that you installed in the previous step should now boot on your device.
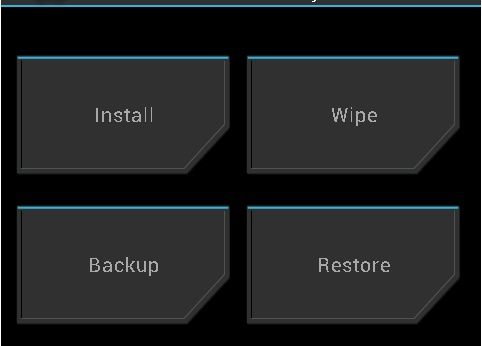
7. In TWRP recovery, tap on Install and then select the SuperSU zip file that you had transferred earlier. The zip file should install itself within a couple of seconds. When done, select the Reboot system option to boot the device into Android OS.
Congrats! You have successfully managed to root your One (M8). You can confirm this by using apps like Root checker on the Play Store or by making sure that SuperSU app is now installed on the device.

