Rooting The HTC One The Right Way [How-To]
The initial launch of the HTC One was delayed by a couple of weeks due to the shortage of certain components, but the handset is now slowly making its way on to major markets around the world. Compared to previous HTC handsets, rooting the One is a pretty straight forward process. In fact, once unlocked, the HTC One behaves like a true Nexus device, as said by a very popular Android developer, Koush.
Before you get down to rooting your HTC One, keep in mind that the steps below are valid for the international device, as well as the AT&T variant of the HTC One. Also, make a backup of all your data on the phone since unlocking the bootloader on the phone will wipe your phone clean.
Ready? Let’s get started.
1. Head over to HTC Dev website to unlock the bootloader of your HTC One. Until and unless you unlock the bootloader on your One, it is not possible for you to gain root access. The steps have been described in detail by HTC, and mainly involves the use of fastboot to enter the unlock command and a Token ID and unlock_code.bin file to achieve it.
2. Download TWRP recovery for your HTC One, and transfer it to the same folder inside which you placed all the adb and fastboot related files, while unlocking the bootloader. Also, rename the recovery file to “twrp” (with an .img extension).
AT&T HTC One owners need to download the compatible TWRP recovery for their phone from here.
3. Open a command prompt instance in the same folder where you have placed the adb/fastboot and the TWRP recovery image files. If you are using Windows 7 or 8, simply type “cmd” in the Start menu search and press enter. Then navigate to the folder using the cd command.
![]()
For example, if you have the fastboot and TWRP files inside a folder named “android” on your desktop, you can navigate to it by entering cd /Desktop/android. By default, a new command prompt instance always opens up in the user directory of Windows.
4. Put your One in fastboot mode by powering it off, and then press the Power + Volume Down button. From the menu that comes up, navigate to the fastboot option using the volume keys and select it by pressing the Power key. Connect your One to your Desktop or laptop.
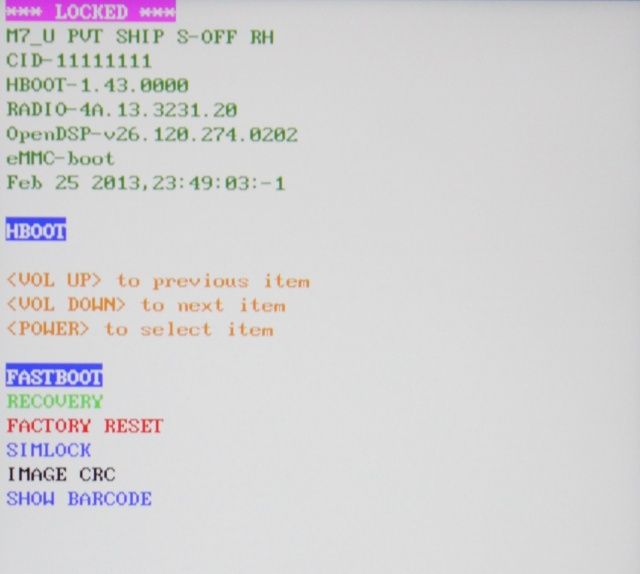
You can make sure whether the handset is detected by your PC or not, by entering fastboot devices in the command prompt window that you opened in the previous step.
![]()
5. Now type fastboot flash recovery twrp.img in cmd and wait for fastboot to flash the TWRP recovery on your One. Once the recovery has been flashed, you need to restart your One manually or by entering the fastboot reboot command.
6. Once your One is up and running, download the SuperUser zip file from Koush and transfer it to the handset. You will now need to reboot your One into Recovery mode and flash the SuperUser zip file from there.
7. Switch off your One, and switch it on in Bootloader mode while holding the Volume Down + Power button. Navigate to the Recovery option and select it by pressing the Power key. Now, TWRP recovery will boot up on your One instead of the stock recovery from HTC. Tap the Install button and then select the SuperUser zip file.
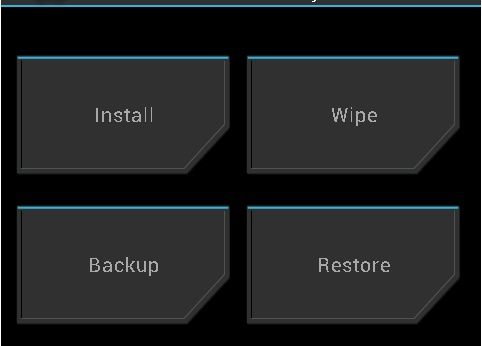
Once the zip file has been flashed, select the Reboot System option to reboot your One.
Bingo! You have successfully rooted your HTC One. Since a custom recovery is also installed, you can successfully flash a custom ROM or other mods whenever you wish to as well.
P.S. – Mac owners need to follow the same steps as Windows users above. Just make sure you download the adb/fastboot files for Mac, and then use the terminal to enter all the commands mentioned above. Don’t forget to add “./” before every fastboot command (For example “./fastboot flash recovery twrp.img”).

